
This is my review of the Garmin 65W Dash Cam, how I installed the Parking Mode Cable in my Honda Odyssey and my GMC Truck, and what Garmin did to resolve my warranty claim. Because the 65W records while parked along with stand alone functionality, I’d easily recommend this dash cam over the Garmin Speak Plus, which is completely tied into Alexa.
I’ll start right now by saying that I love this Dash Cam! It is worth every dollar! I did a TON of research and decided on the 65W with the 4K wide angle (180-degree) lens for $249.99 (vs $179.99 for the Speak Plus); I also purchased the optional Parking Mode Cable for $34.99 – an amazing feature!
I was very excited about the built-in Wi-Fi, voice-activated controls, forward collision, lane departure and go alerts but later discovered some of these features are better off not used. The Go Alert and Lane Departure are more of a nuisance for me, but the voice activated control is a “Must Have”!
For example, simply say “Okay Garmin, Save Video” and you’ll capture the crazy driver in front of you. Below is one such video where the driver loses control of his car
The G65 is always recording but won’t create the video file until it detects a collision or until you issue the save command – what’s cool about this, is that when you tell it to save, the video saved includes footage before, during, and after the command (or event). That is how I got the entire dash cam footage shown above – I simply told it to save video after I had safely passed the car (it was an afterthought).
Here are some facts you should know:
- Wireless – it is for sharing pictures with your phone & doing firmware upgrades (you’ll need to install the Virb app on your phone). For some reason, I thought I could tie into my home wireless and do updates, etc – I can’t.
- Lane departure – Like I mentioned above, I think this is more of a hassle and is always beeping at me (perhaps it’s just my driving technique). It is intended to warn you when you cross a solid line, to help prevent running into opposing traffic or into a ditch. It does not work well in low light, snow, rain, etc.
- Forward collision warning works fine in my minivan, but my truck’s height makes the Garmin think I’m running into cars and bombards me with audible alerts.
- Red light and Speed Cameras – requires a subscription which I didn’t get.
- The 2.1 megapixel camera takes amazingly clear pictures! Simply say “Okay Garmin, take a picture”.
- Travelapse is really cool on long trips and a great way to document your adventure without having to constantly record and chew up your memory card.
- Memory card (microSD or microSDHC) is 8GB standard, but I am using a 32GB and it seems to last forever! You need a card rating of class 10 or higher and it can’t be larger than 64GB.
- Recording motion while the vehicle is turned off works like a charm and does not have a noticeable effect on the car battery; however, It may have been enough to help drain my van’s battery after being left on for a week while we were on vacation. It was extremely cold during that week so I can’t tell you with certainty it caused the problem – I’ve never had a problem since.
Problems caused me to make a Warranty Claim
A few months after I purchased the 65w, it seized up on me after a voice command and started beeping repeatedly while dispaying the message “audio recording started”. See the video below.
I disconnected it from the power source, but the dashcam’s battery kicked in and kept beeping. I tried resetting my dash cam by holding the power button for more than 12 seconds but the solution eventually was to let the battery drain, recharge and then plug back in.
Although the dash cam came back on and the screen would react to my voice commands, it no longer had sound; the confirmation beeps, alerts, etc. were all gone. Because I didn’t want to deal with having to argue with Garmin about a warranty repair, I continued to operate this way for a couple of months. I had planned on filing a claim before my 1-year warranty expired, but two months later it just died on me, completely. Nothing I did (reset, battery drain, etc) helped.
I was pleasantly surprised when Garmin easily offered to replace my dash cam!
- I purchased the unit on 9/25/2017
- I filed a warranty claim (and sent the unit in) on 4/1/2018.
- Garmin received my broken dash cam on 4/12/2018
- On 4/13/18 they let me know the replacement is on its way via DHL
- On 4/17/18 at noon it arrived on my front porch.
In fact, they asked me to send them only the camera and what I received in return was an entirely new unit, including cords and an 8gb micro SD card. So nice to do business with a company that doesn’t put you through the wringer!
Installing Parking Mode Cable
The parking mode cable allows the 65w dash cam to record video after detecting motion when the vehicle is off! It is amazing what you can catch when your not around your vehicle :) Next time someone backs into your parked car, you’ll have a clear video of the entire event.
Installation on the Honda Odyssey
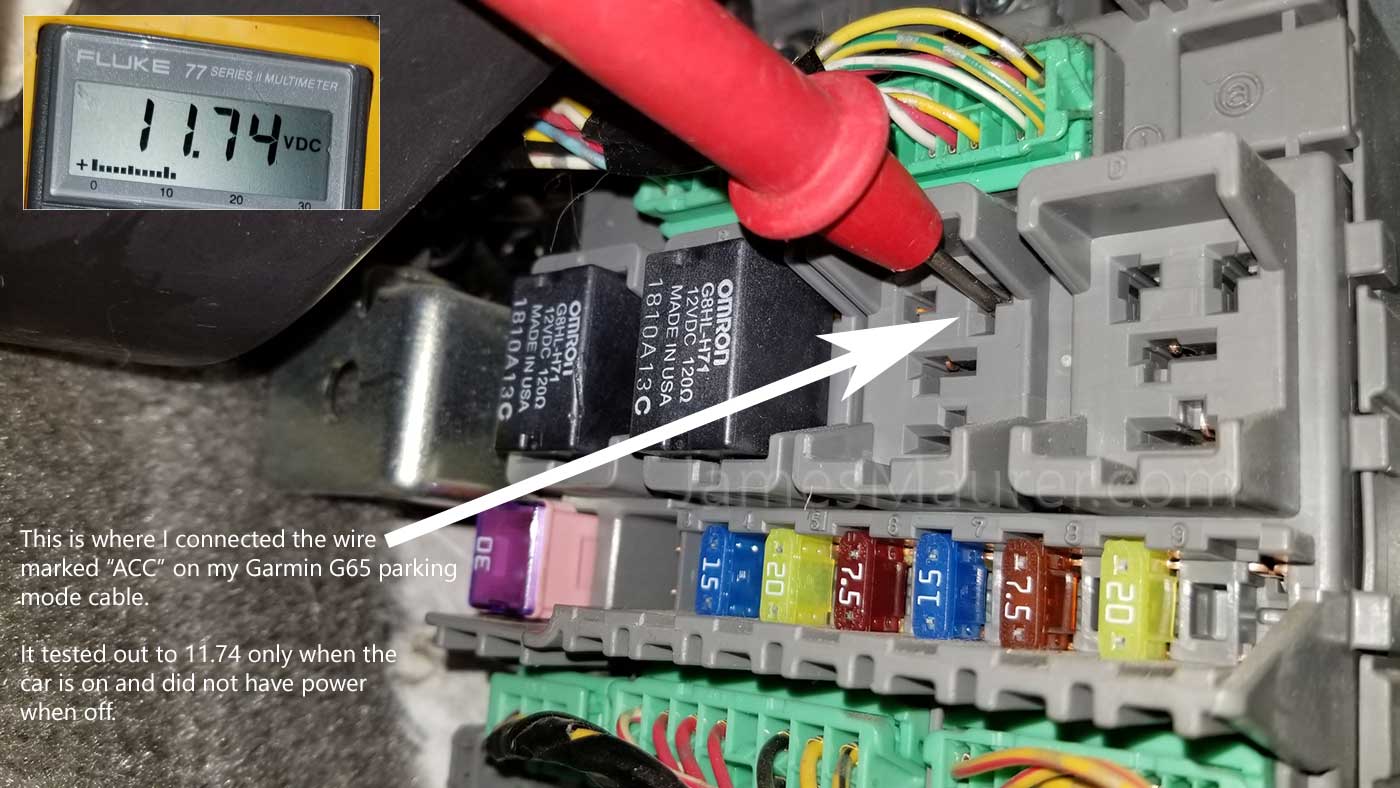
Garmin’s parking mode cable comes with three wires labeled ACC, BATT and GND. I used a multimeter on the passenger side fuse box of my Honda Odyssey (near passenger’s left foot) to find the right slots to plug into. I found the relay in Slot C, top right, had 11.74 volts when the van was on and nothing when it was off which was perfect for my ACC connection.
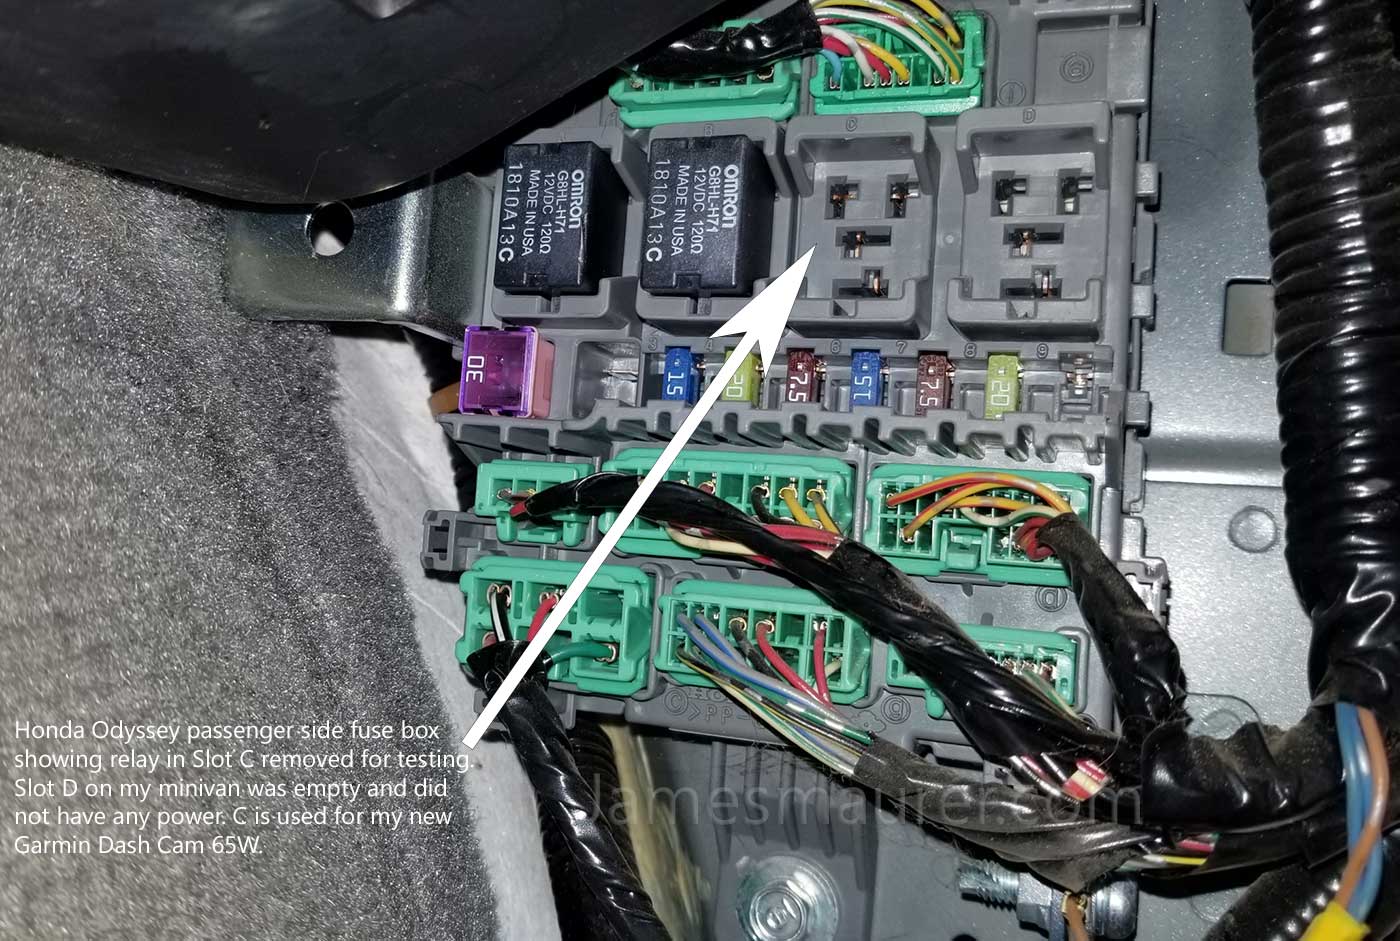
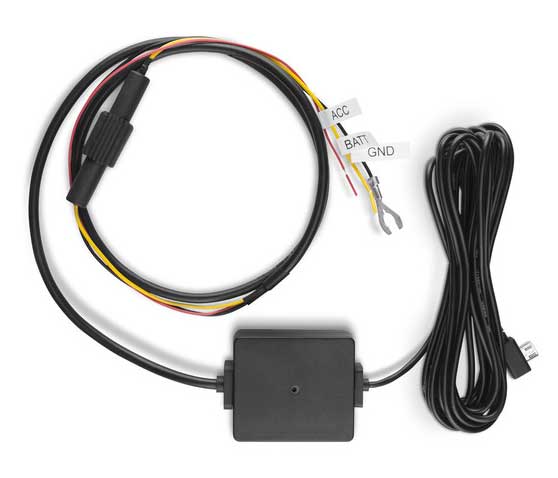
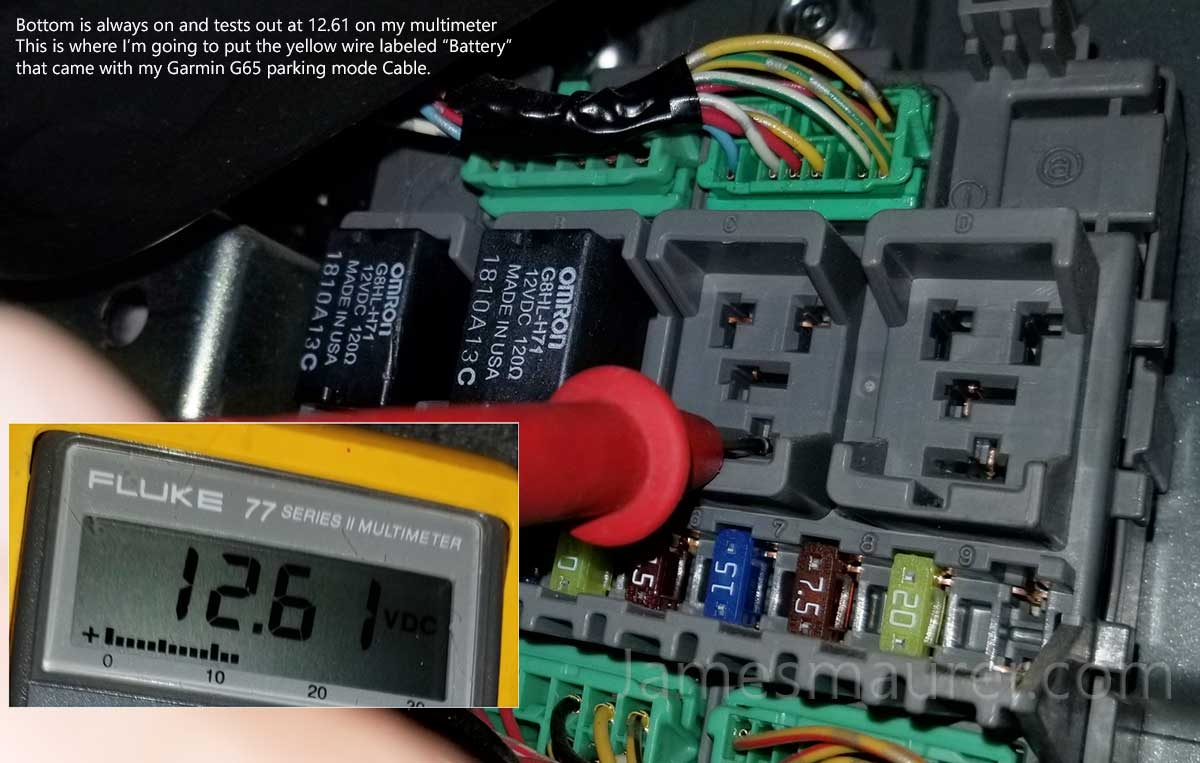
Below is a picture of Garmin’s parking mode cable. The ACC gets connected to the accessory slot that does not have power after the van is turned off. The BATT hooks to the slot where there is constant power, even when the van is turned off. The GND is attached to a ground screw near the fuse box.
Below is a picture of where I attached the wire labeled “ACC” (Slot C, top right, 11.74v):
Below is a picture of where I attached the wire labeled “BATT” (Slot C, bottom, 12.6v):
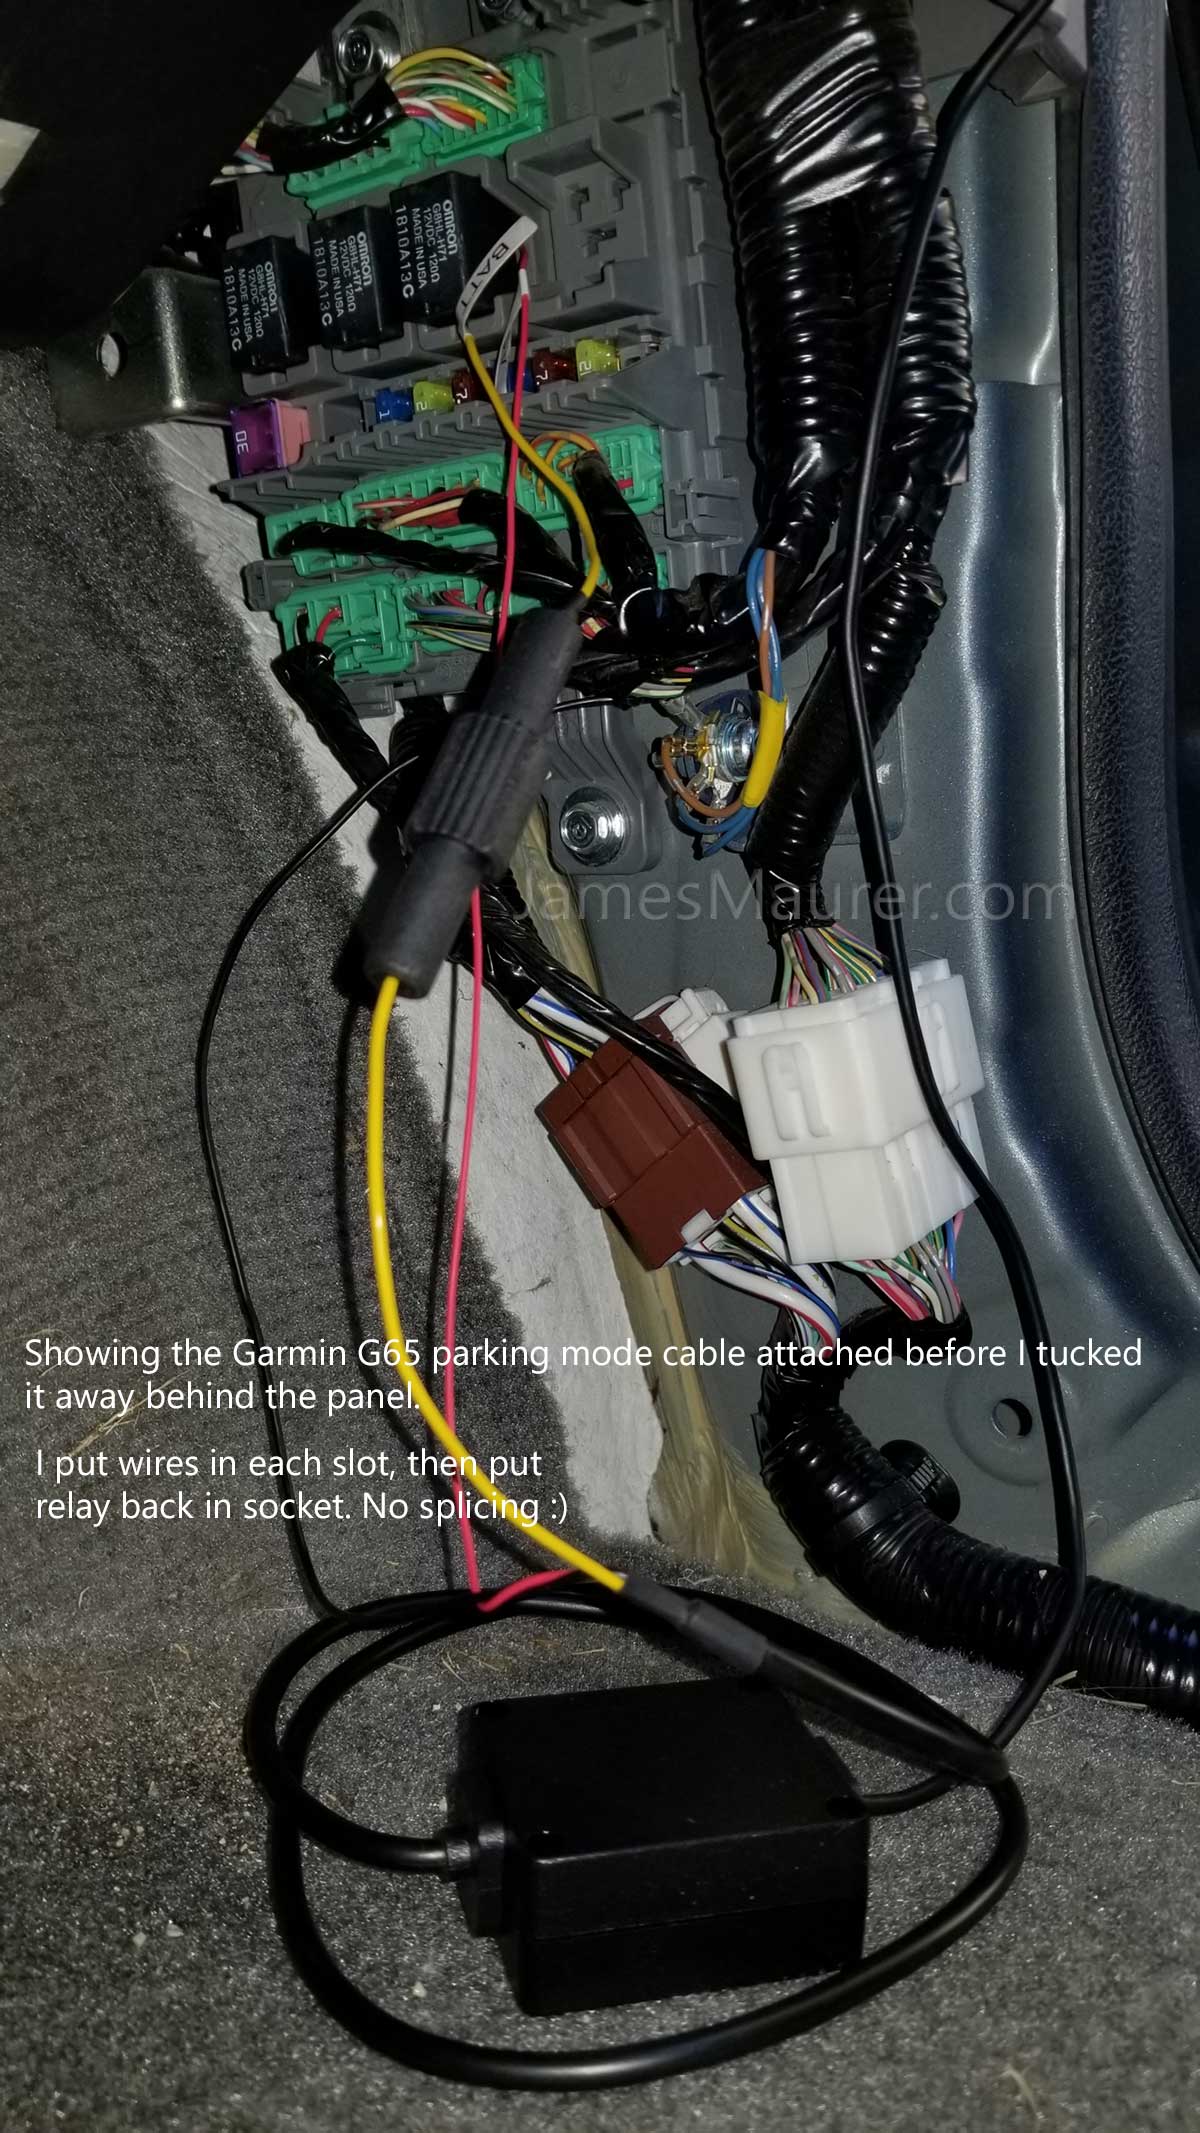
Below is a picture of where I attached the wire labeled “GND” (connected it to the screw). It looks like the black BATT wire is going into the group of wires but it’s not, it connects to the screw:

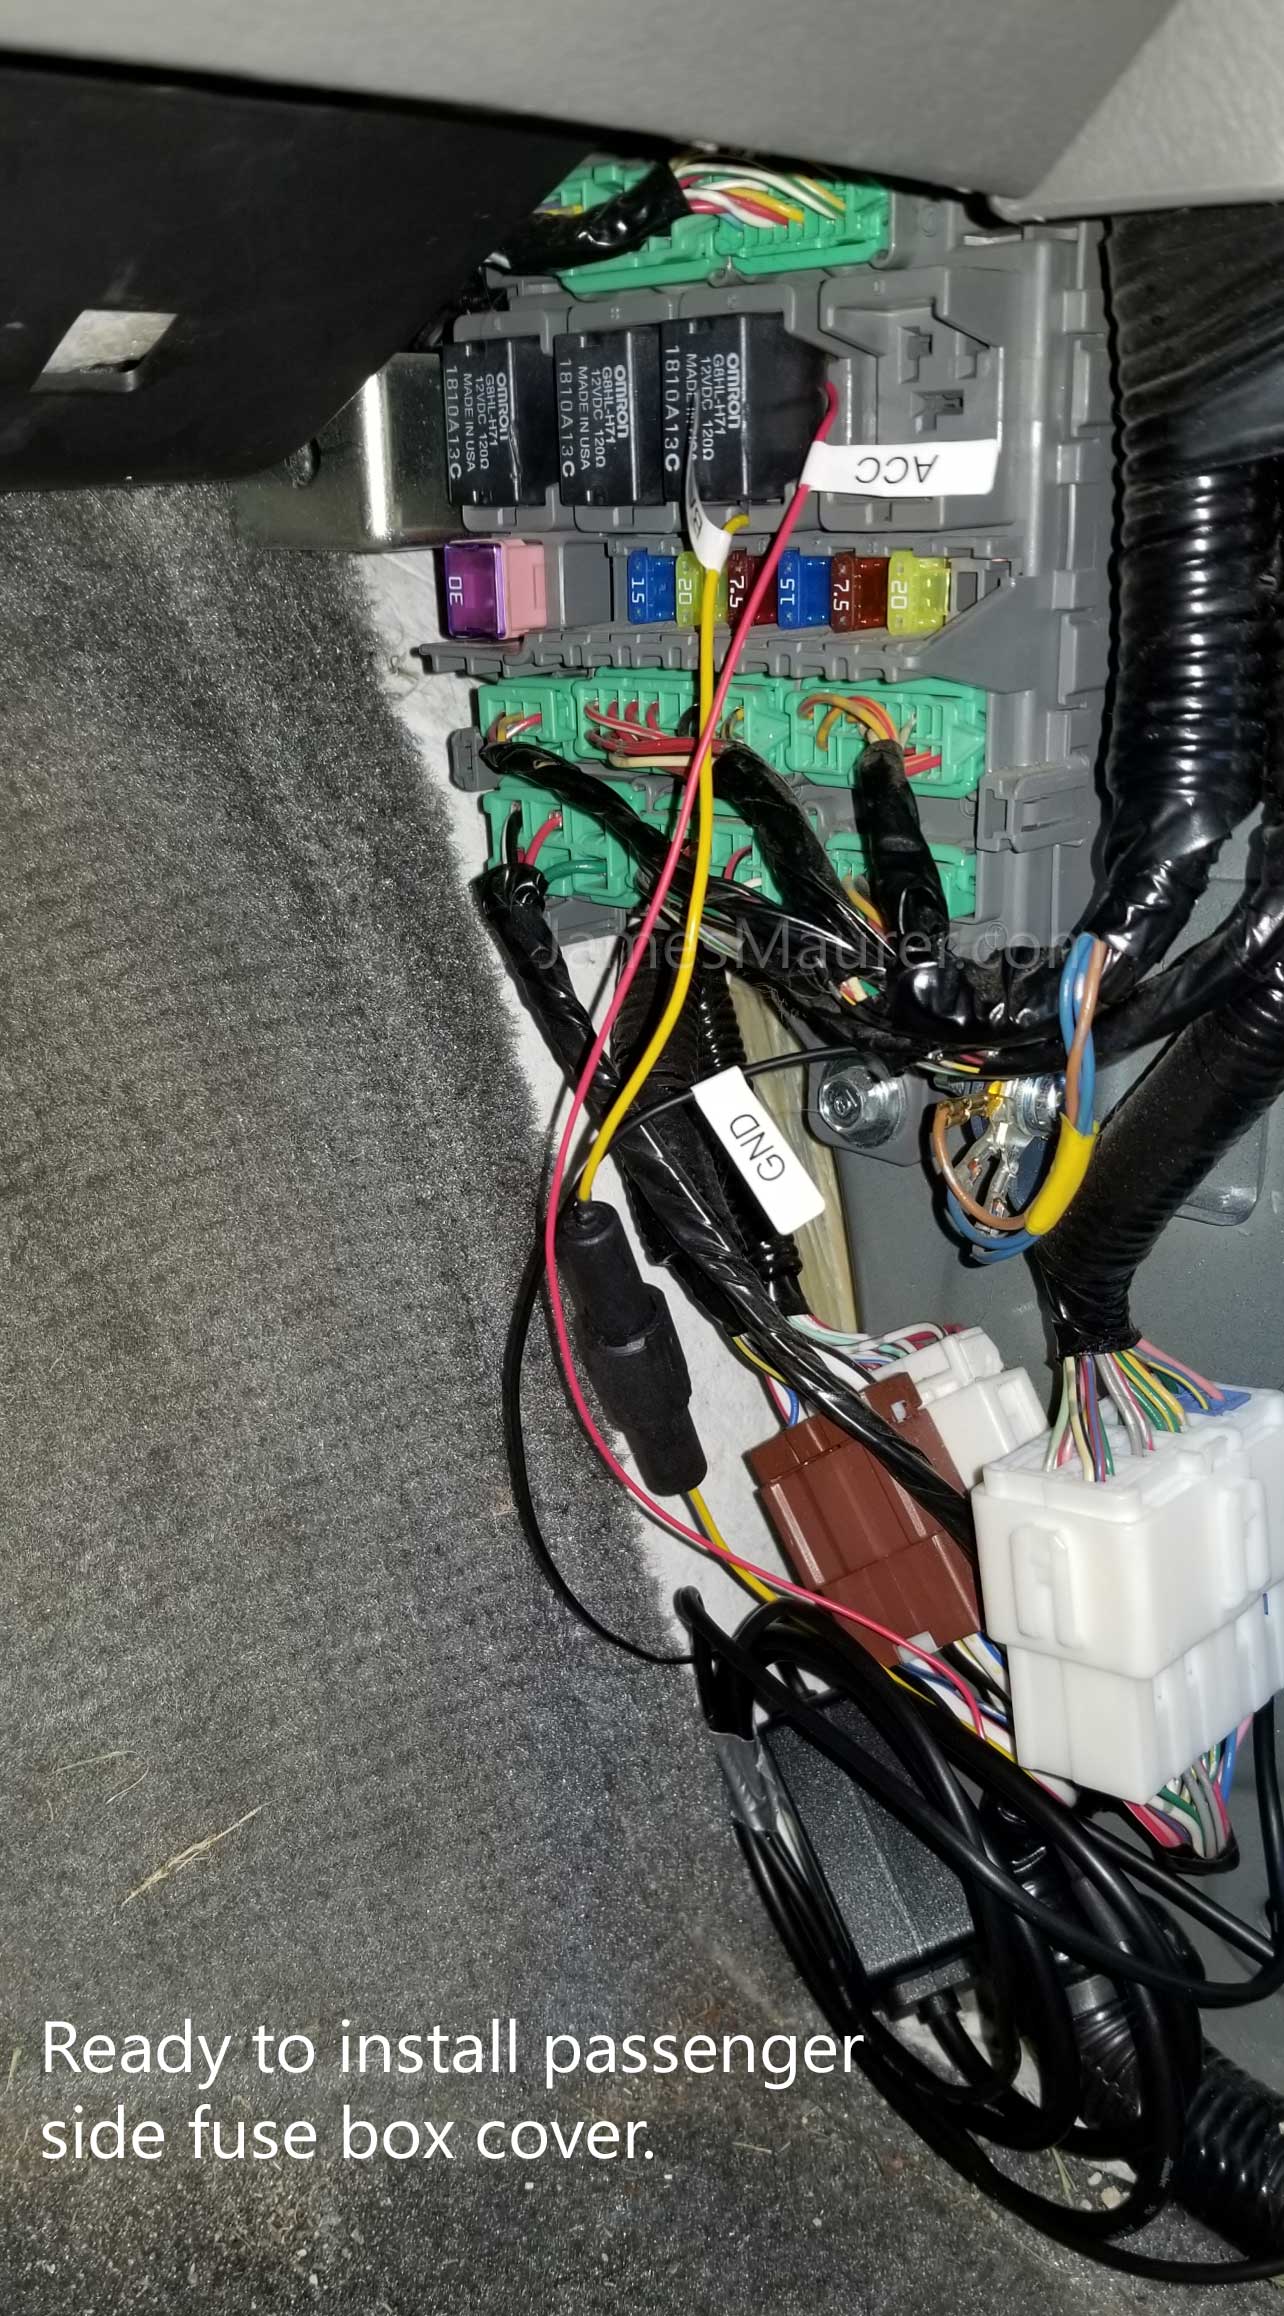
Below is my Honda’s passenger side fuse box with the cover over parking mode cable:
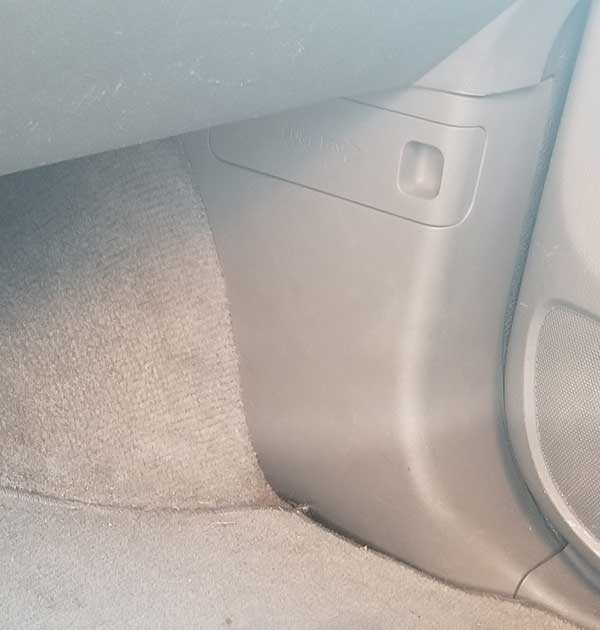
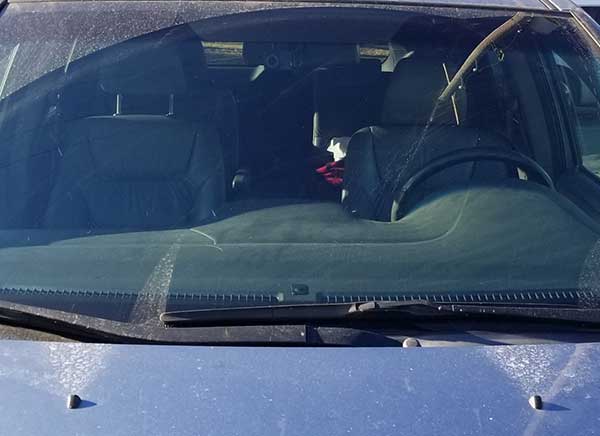
And below is a picture of the dashcam installed on my Honda Odyssey Van (I placed it just under the mirror so it doesn’t obstruct my view):
I simply used my finger to push in and hide the parking mode cable along the edge of the door and windshield. Very easy!
Installation on the GMC Truck
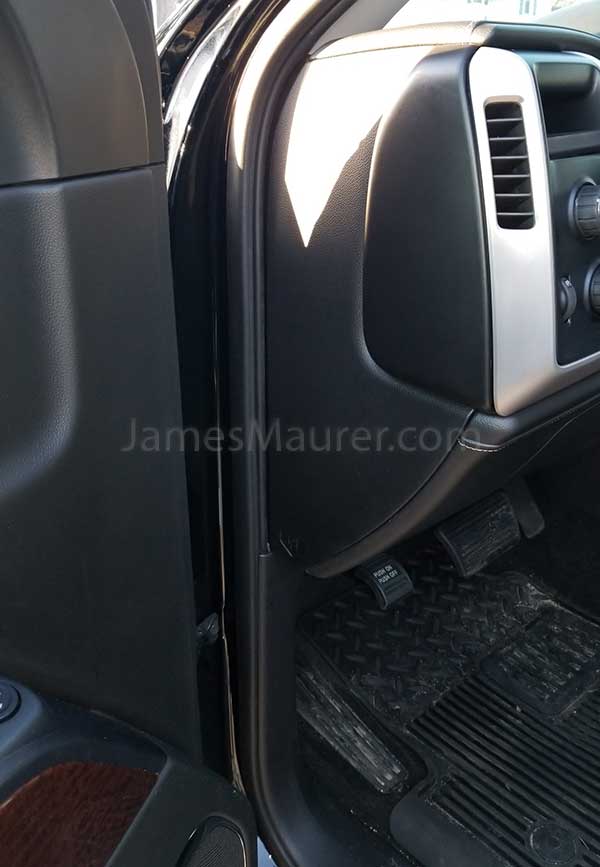
Installing the parking mode cable on my GMC truck was done on the driver’s side fuse box. There are two, one is your standard fuse box which has a round hole I used to thread the parking mode cable through, and the other is located under the dash above the driver’s left foot, shown below:
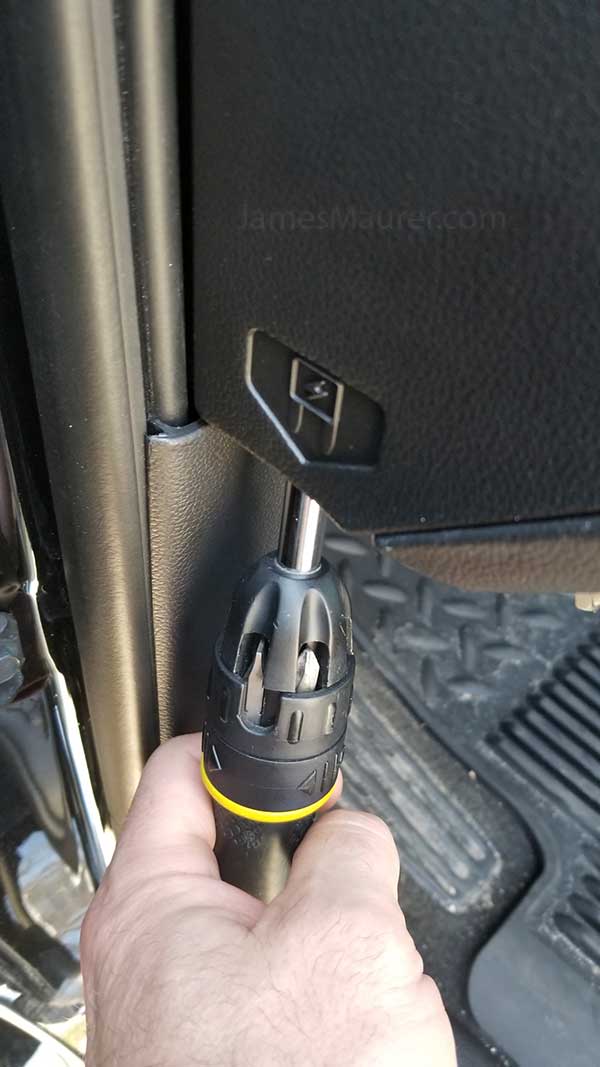
To remove the fuse box cover on my GMC, I used a screwdriver to put force from the inside out.
This is what it looks like with the cover off. Note that I don’t use this fuse box to connect my dash cam but instead use it to hold the wires and thread the ends through. You can click on any of these images to enlarge. I’ll show you the hole later.
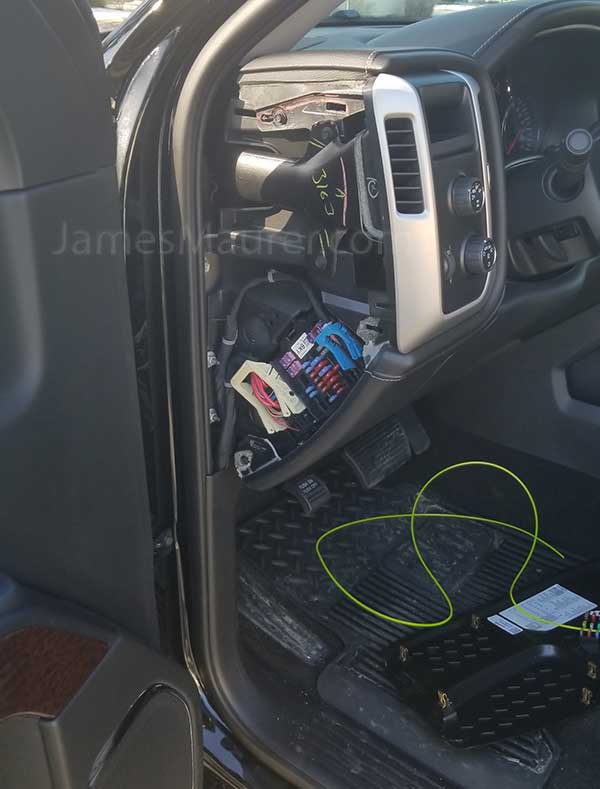
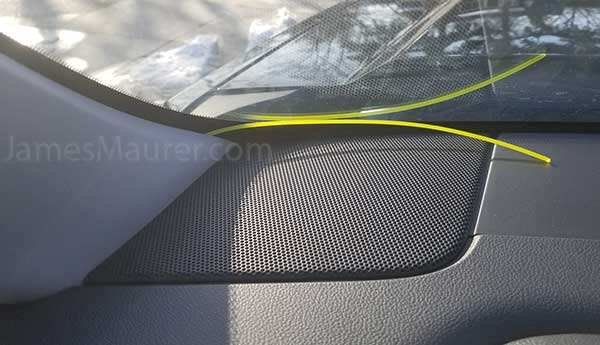
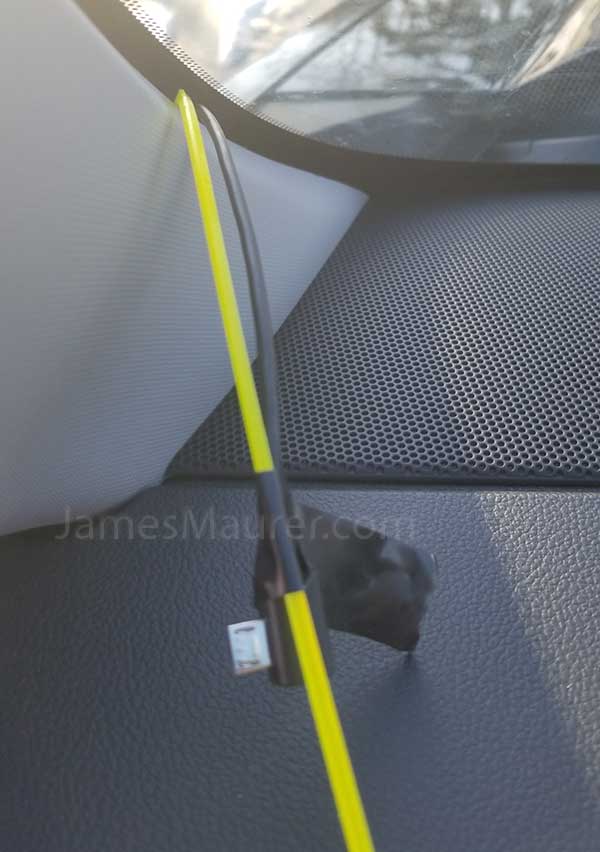
There is a nice gap between the dashboard and windshield that allows you to thread the parking mode cable through as shown below – I’m threading the end that connects to the dash cam:
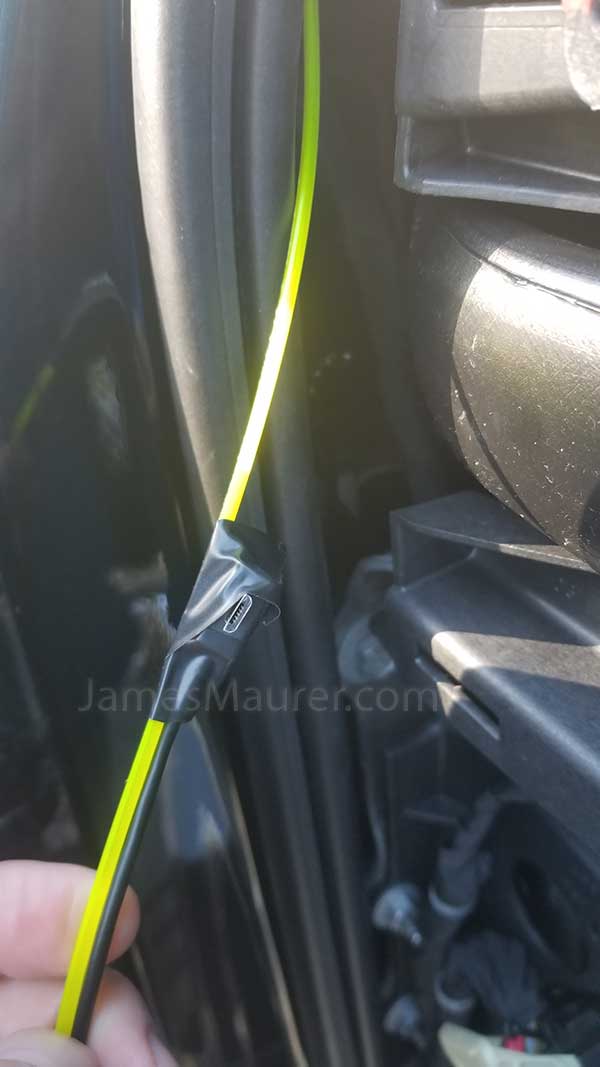
I used black tape to attach the parking mode cable to my plastic line so that I can fish it through the opening.
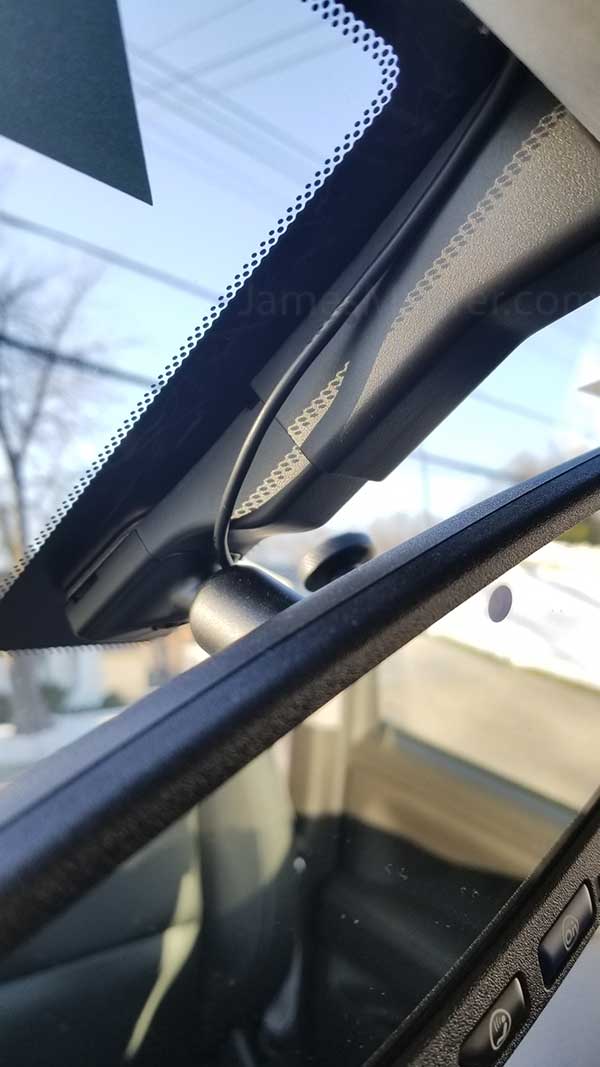
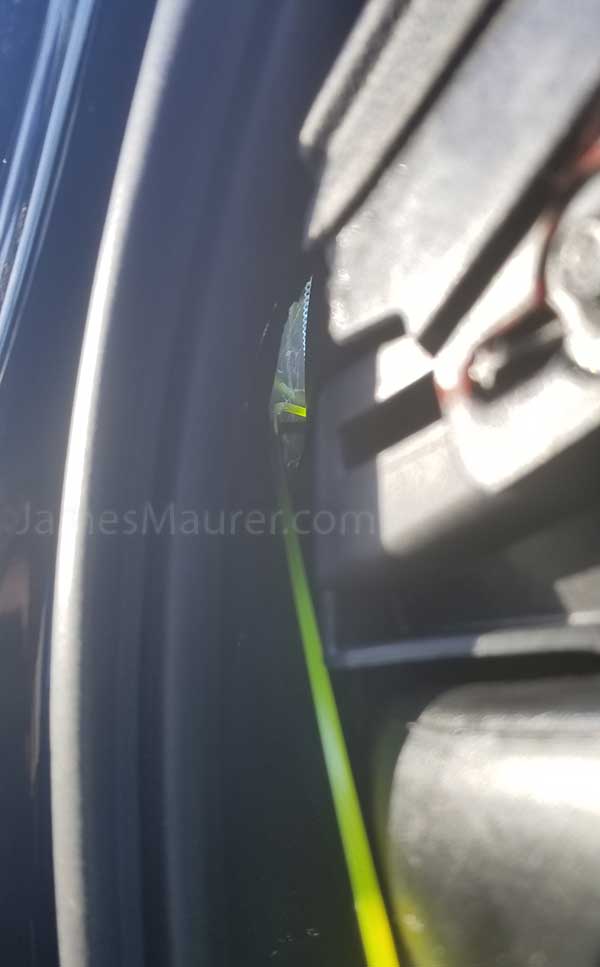
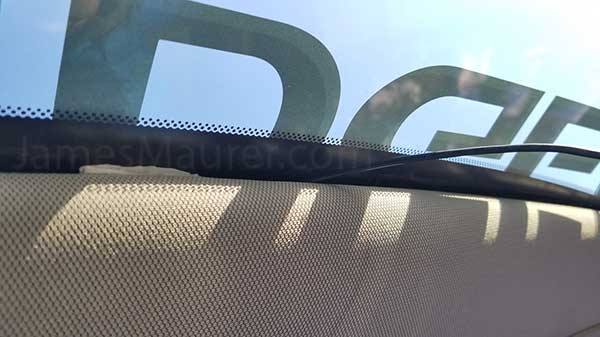
The cable fits nicely between windshield and liner, but I used a bit of folded paper towel to keep it in place.

I tucked it in further but wanted to leave a little so you can see what I’m talking about.
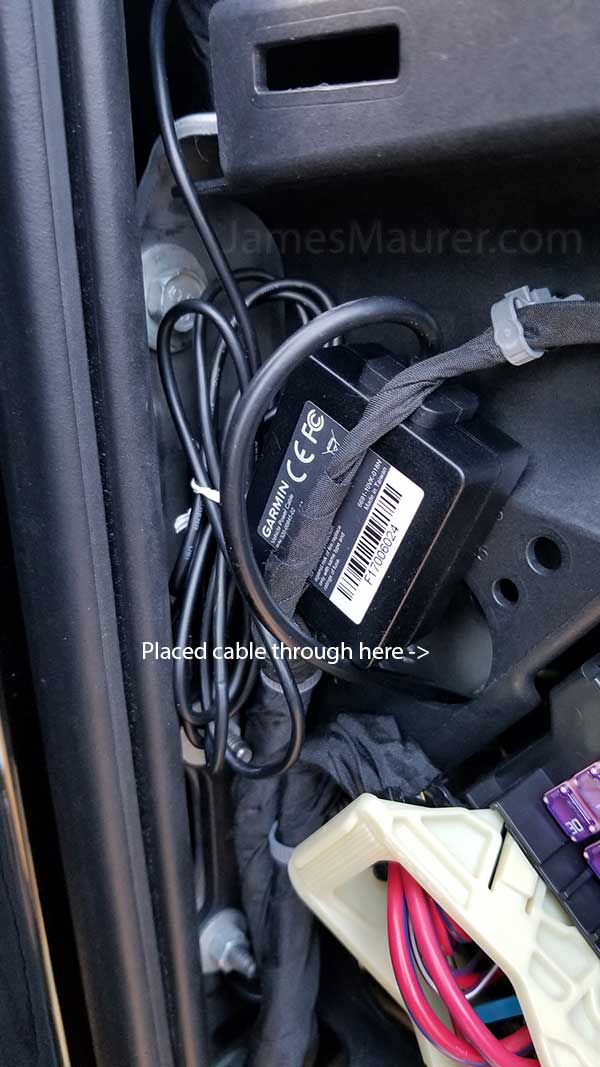
The parking mode power converter tucks in nicely near the fuse box shown below which is the same shown in the pictures above.
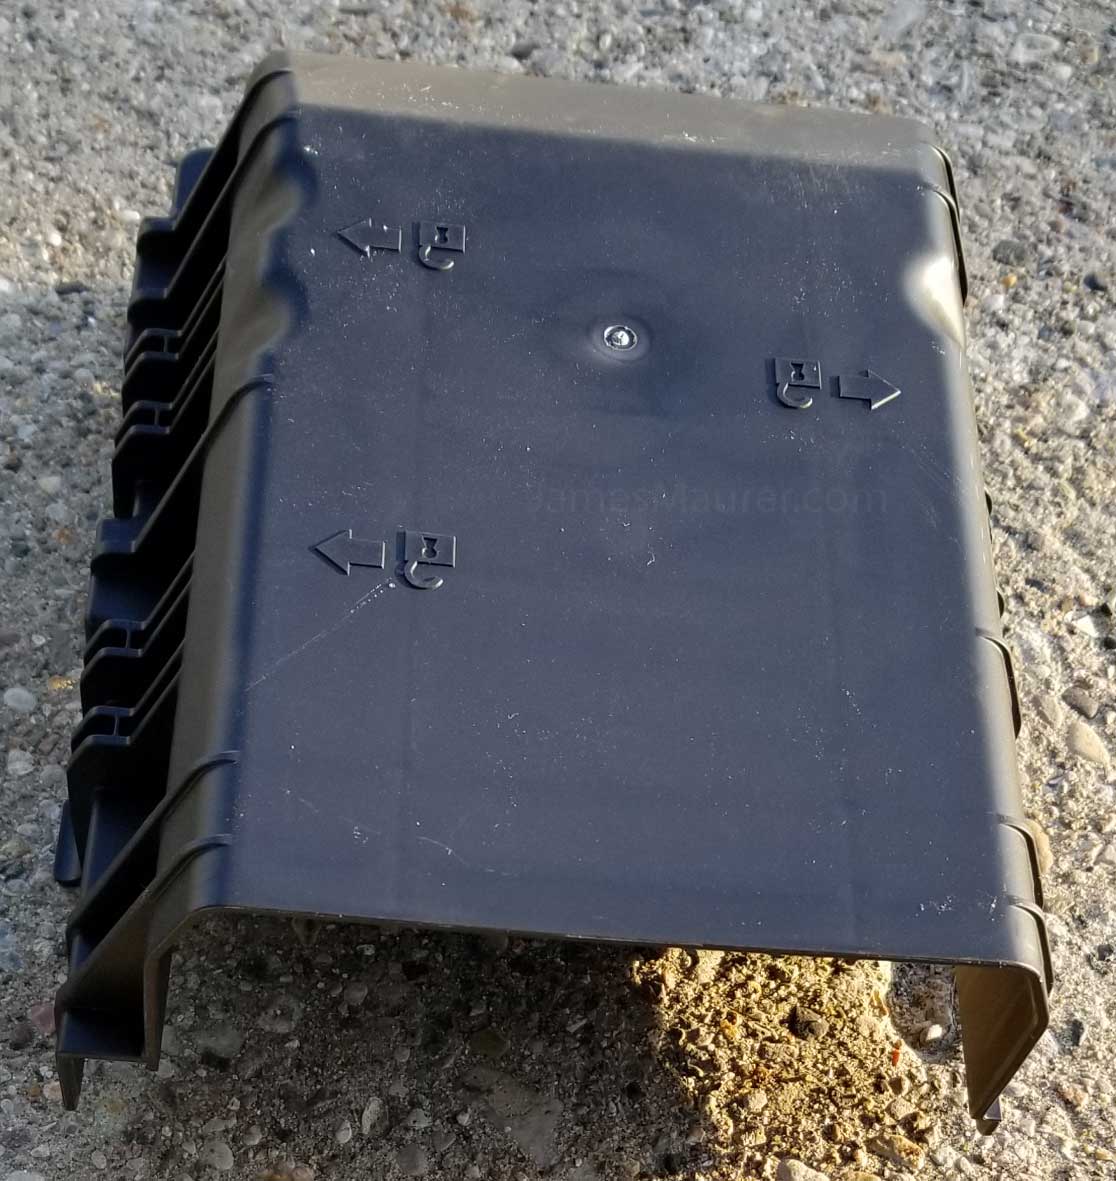
The fuse box below is located under the dash above the driver’s left foot between the brake pedal and the parking brake that has three clasps you’ll gently pry until the cover can be removed. Here is what the cover looks like front and back.
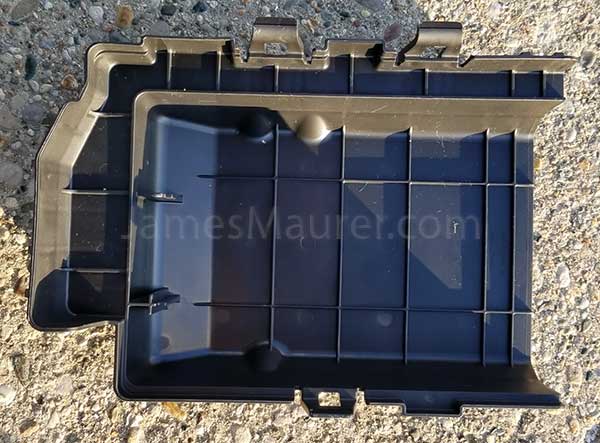
After you remove the cover, you will find an empty relay block with 11 connectors (there are 20 positions, but not all have connectors sticking out).

- Pin #10 (top left) is where I placed my GND ([black] ground) wire.
- Pin #8 is where I attached my ACC ([red] accessory) wire, there is a connector between #10 and #8 so I used black tape to make sure they didn’t touch. Note that #8 is referred to as Retained Accessory Power (RAP).
- Pin #17 is where I attached my BAT ([yellow] battery) wire which is the 3rd pin down from top right but note that slot #18 does not have a pin).
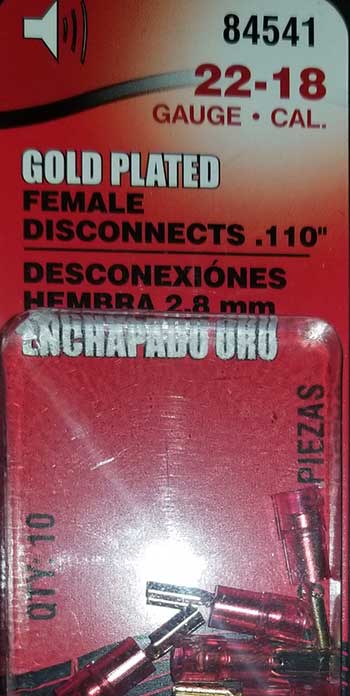
BTW, I used a 22-18 gold plated female disconnects .110 which you can buy at any auto parts store.
Your Dash Cam can prevent a lawsuit!
There are so many ways that this dash cam can protect you. Parking mode catches motion when your vehicle is parked, making it a hidden camera, just point it at the spot you would like to monitor and catch the culprit, but did you know it can protect your income? There are a ton of insurance scammers out there that will pull in front of you while driving and purposely hit the brake to cause an accident!
Check out this footage of insurance fraud scammers caught by a dash cam:
Have a newly licensed teenager? Who do you think the police will side with, your child or the senior citizen that caused the crash? With footage, there is no guessing :)
Worried about your footage being taken from you? Simply pop out the microSD card with a simple press (it’s smaller than your fingernail) and stick it somewhere safe ;)
Garmin’s 65W is easy to install, doesn’t get in your way, and will provide you with peace of mind; a couple hundred bucks could save you more than you realize!
Update 4/25/18, 4/29/18
I gave it a voice command while driving and noticed the screen looked similar to what I have shown below:
It responded with the chirps like I expected, but I was really disappointed that this brand new unit was malfunctioning less than a week after getting the replacement! I thought it might be the heat, but here in Michigan, it’s something we don’t have right now :)
I pulled over to take a picture with my phone and it behaved perfectly normal. I have not been able to recreate the problem yet, but when I do, I’ll post it and file another warranty claim and reinstall rather than run the risk of exceeding my coverage period.
On 4/29 – The dash cam beeped on it’s own as if I gave it a voice command, turned colors, and then the screen went black. When I gave it a command to duplicate the problem, it behaved perfectly normal?

Update: 11/10/2018 – I love this Dash Cam, so I’ve purchased another Garmin Dash Cam 65W and installed it in a Hyundai Tucson with the parking mode cable attached to switched power (accessory power) using a Jimmy Rigged ATM Low Profile Mini Fuse Blade. I’ll post pictures and details later.
22-18 AWG 110 SPADE VINYL QUICK DISCONNECT MALE CONNECTOR TERMINAL
WARNING: If you connect the power cable the wrong way you can damage your car, the battery, or even hurt yourself, so make sure you verify your connections with the manufacturer BEFORE you begin. I’ve posted how I connected the Garmin Dashcam 65w parking mode cable above which worked for me, but I’m not an expert and it may not be the proper route for you.
—————————–
Disclaimer: Garmin did not solicit me to write this review nor did anyone else – I purchased my dash cam because I have a teenager who will be driving soon and I wanted a way to document events should I need them. I took these pictures and documented the process so that others could enjoy an easy install. If you have questions, tips, or concerns, please leave a comment below.
Leave a Reply
Want to join the discussion?Feel free to contribute!