Sprinkler Pump Makes Clicking Noise
My lawn is watered from lake water and I have a nice multistage irrigation pump. After priming it, I turned the system on and immediately noticed a clicking sound which the pump would turn on and off by itself; not good for the pump, so I cut the power and decided to troubleshoot.
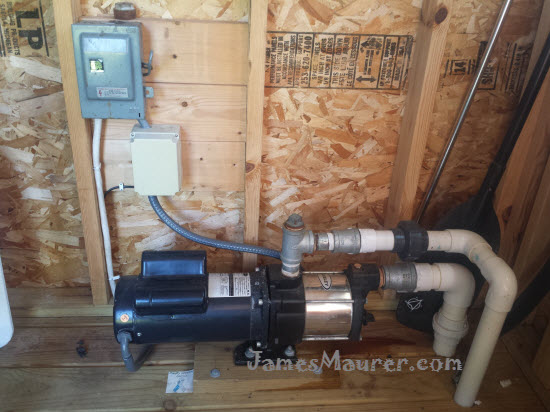
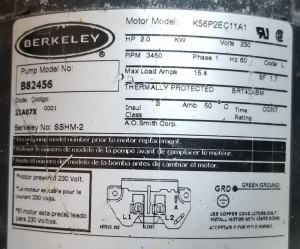
And here is a close-up of the tag on the irrigation pump, which is a Berkeley model# B82456 SSHM-2 which is a 2HP 230 volt with a motor model# K56P2EC11A1 :
1. Check Rainbird Spinkler Control Unit
The first thing I checked was my Rain Bird sprinkler control unit thinking that my timing was set to 1 minute and causing the system to turn on and off; however, after reviewing all the sprinkler timings (about 20 minutes per zone) everything appeared normal.
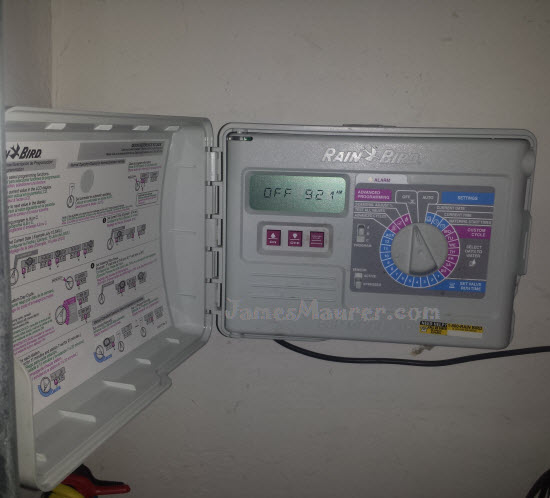
2. Check Rainbird Spinkler Control Unit Timing
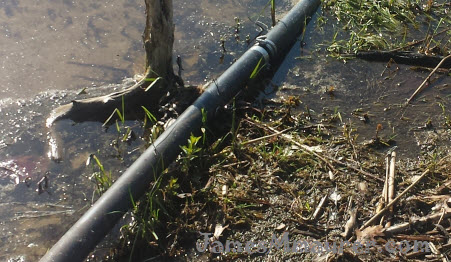
My next step was to look at the irrigation intake line, the one that sucks in water from the lake and feeds the sprinklers. When took in the line for the winter, I bent the hose which created a small leak, and without water, the pump could be clicking.
3. Check Spinkler Intake Line for Leaks
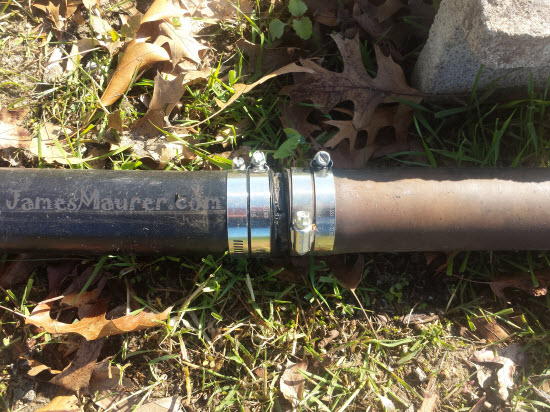
I patched the hose with four clamps and used a Bernzomatic propane torch to seal the sprinkler intake valve and made sure there were no leaks. I later found out that a leak is not going to cause the sprinkler pump to turn on and off.
4. Understand Your Irrigation Pump Relay Switch
My next step was to look at the irrigation pump relay switch. I’m not an electrician, so I turned off all the power from the breaker box just to be safe and then opened the white box that contained the pump relay so I’d have a better idea of what I’m dealing with.
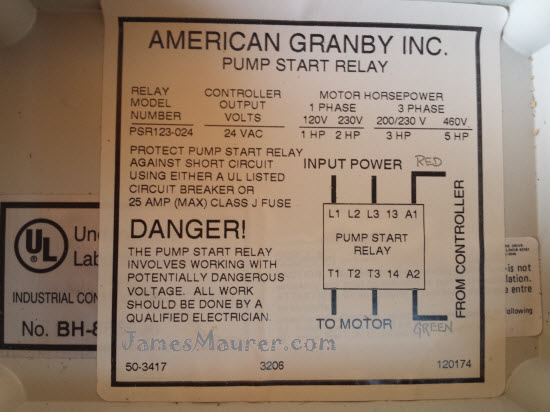
5. Locate Pump Relay Switch Model Number and Replacement Cost
Having opened up the casing to the pump start relay, I could see it was American Granby Inc. model number PSR123-024 and the big Danger warning! I searched the internet for a replacement cost and found that it was going to cost me $132.03 – IF i had to replace it (I didn’t) :)

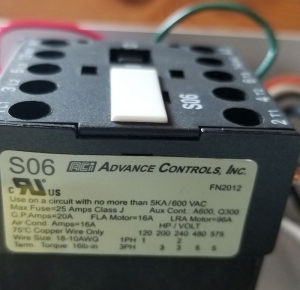
On the side of the relay switch shown in the picture below (which is also called a contactor), it said:
S06 ACI Advance Controls, Inc. FN2012
Use with circuit with no more than 5KA/600 VAC
Max Fuse=25 Amps Class J
G.P Amps: 20A FLA Motor-16A LRA Motor=96A
Air Cond Amps=16A
75C Copper Wire Only
Wire Size: 18-10AWG
6. Locate Wires from Sprinkler Control Unit
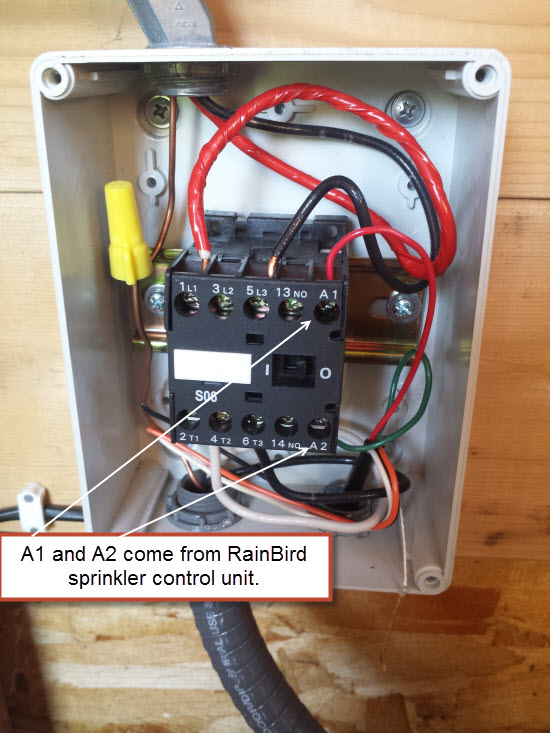
After looking at the wiring diagram, I could see that A1 and A2 were low voltage from the rainbird control unit (the part were you set sprinkler zone times). I also noticed that the white and orange wires were next to the ground wire so I bent those the other way just in case. Image below shows wires coming in and out of my relay switch (contractor – S06 ACI Advance Controls, Inc. FN2012 [model number PSR123-024]:
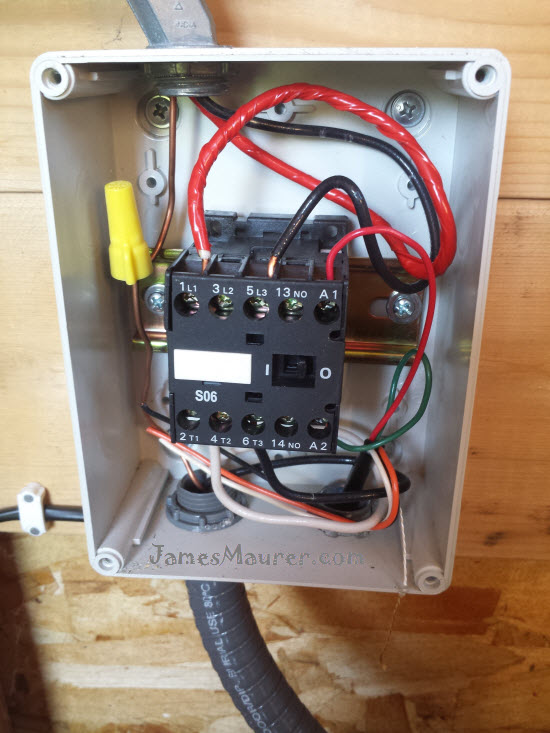
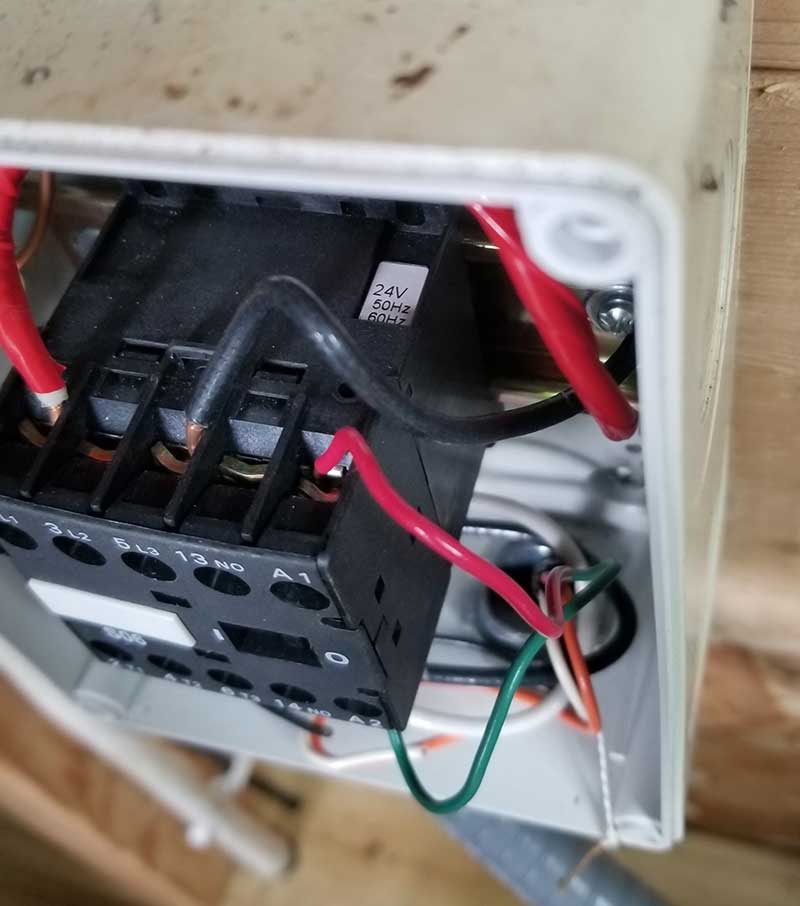
Also, if you don’t have any tags on your relay (contactor), you can look at the back of the A1 for a white tag which should give you the coil voltage of the contactor (in this case, 24V), as shown in the image below:
7. Test Spinkler Control Unit Voltage using a Multimeter
I took the wires out from A1 and A2 of the pump start relay block and used a multimeter to monitor the voltage. It seemed a steady 24 volts which told me that the sprinkler control box was sending the correct voltage and working properly.
8. Clicking Noise to Spinkler Relay Pump Fixed
I hooked up the small red and green wires back to the irrigation pump relay and made sure they were tight. What I found was the the small green wire had come loose from years of vibrating and once I reconnected it ran like a charm! A savings of $140!
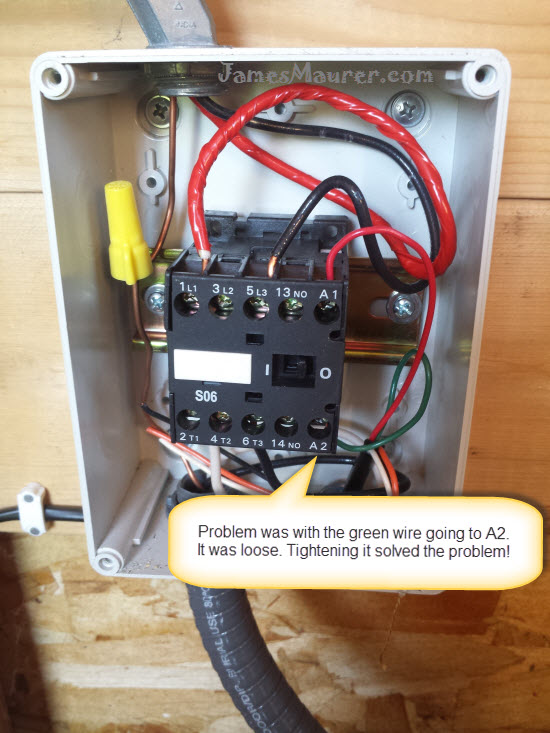
So before you go buy a replacement relay switch, check to make sure the wires are tight first!
If are you buying a replacement, consider the orbit 57009 sprinkler pump relay for $36! A lot less expensive than the ACI!

